Thursday 1 December 2022

Chapter 8 : Paper Relief into Fabric Relief

Little by little we're been edging towards using fabric, and there's the hint of using stitch on the horizon.

I had been rather disappointed with my Chapter 3 paper samples, feeling that I'd somehow missed the point.  However, rather than redo them I've pressed on and am writing up my responses to the first three.  I'm thinking that in doing this I'll be able to work out my thinking more clearly and spot the gaps in my ideas.

Sample 1:

8:1 shows my paper relief of the stalks left from last year's crop: a collection of torn papers rolled and simply tossed onto the background then glued in place.

My first fabric relief uses a technique I like very much indeed and have used in a number of modules.  Firs,t I created tubes in small pieces of crisp cotton organdie and I threaded them with a number of strands of thick knitting yarn.  The wool and stitched ends have just been left.  Then I pieced the fabric scraps together.


8:1


8:2

 8:3 uses a piece of towelling onto which various lengths of sari silk have been stitched using a wide wing needle. The sari silk almost appears to be embedded in the towelling. The tension setting and variegated thread add to its unfinished appearance.


8:3


Sample 2:

8:4 shows my paper relief of a dandelion plant.  This was created using straws and tissue paper and is based on a drawing I made in my field.


8:4

8:5 below uses a single template from the same drawing.  The individual leaves are cut from cotton organza.  The vein is slightly gathered then a piece of wire couched in two directions to create rough crosses.  The combination of crisp fabric, gathering and wire gives each leaf a nice spring and twist reflecting the barbed and somewhat aggressive nature of the plant.  As yet these are only pinned onto a piece of black foam core.


8:5


8:6 below uses five different templates taken from the same drawing.  This time the leaf is cut from silk velvet and layered with fine calico stiffened with iron-on interlining.  The vein is machine stitched and threaded with thick wool.  This combination allowed me to shape the leaves so there's a sense of movement.  In choosing velvet for this sample I was trying to reflect the plant's growth and the way from the centre it extends across the ground.  Again, these individual leaves are pinned into position on a piece of black foam core.


8:6


The two dandelion fabric reliefs are only partially successful.  Although the fabrics and techniques used contrast with each other I need to think more about making a surface.  Perhaps the answer is to think about looking at the negative spaces.


Sample 3:


8:7


So, above in image 8:7 is a paper relief of my field's hedgerow. This time I've created more of a surface. It was made with tissue paper manipulated on a sheet of black card painted with PVA glue.  This is a section of that complete sheet.


8:8

For 8:8 I chose silk netting.  The fabric was pleated forwards and backwards, sometimes rolled to produce branch-like features of the width and density I required.  These features are held in place with an invented couching stitch.  The thread isn't firmly fixed but the tension allowed the fabric to relax and hold itself.  Threads are left hanging.


8:9


For 8:9 I used white tights fabric pulled really tightly over an embroidery frame.  Small strips of thick calico were stitched with Coats Duet thread using back stitch to create the hedgerow branches using both the paper sample and one of my charcoal drawings as references.   I had hoped when the fabric was released from the frame that it would spring back into shape allowing tucks, gathers and undulations between the various calico shape.  I was disappointed, as for the most part the fabric remained relaxed.  However, the reverse side is more interesting and effective.


8:10


*          *          *

As I mentioned at the beginning of this post I needed to add further examples to my Paper Reliefs and here is the first of them.  I've included the original photographs as well.


Sample 4:


8:11


8:12


This Paper Relief shows the background hedgerow entanglement drawn with a white crayon, tufts of grasses are in front and these are made from various lengths of narrow folded tissue paper which are tapered at the ends.  I like the layering of the mass of irregular shapes created by the hand drawn branches with the straighter grasses.  These are partially glued on along the fold so that there's variable opacity and some movement too.

8:13

8:13 shows the white crayon background drawing interpreted in paper string and couched with brown thread.  It's worked in a frame on reused silk organza.  It has a light and open almost lace-like quality.


8:14

8:14 interprets the paper grasses in the foreground.  Here pleated silk organza is hand stitched in trapeze shapes and applied at angles then slashed.  The photograph doesn't really do the technique justice.  What I like are the variations in opacity and translucence.


Sample 5:

8:15 is a photograph of a small clump of stems emerging from stony ground and the second addition to the original Chapter 3 work.  The tissue paper is a free interpretation which make it seem less clump-like.  It's made with twisted paper stems and both individual and pairs of leaves manipulated by crumpling and folding.  After a number of attempts I found tearing the leaves gave the best edge and I felt really pleased with the result.


8:15


8:16


Interpreting these fragile and wayward stems in fabric was another level of challenge.  I chose fine scrim and stitched a vein in brown linen along the centre of each leaf.  On its own the scrim was too floppy and so I ironed on some Bondaweb sandwiching it between two layers of scrim initially, but finally settling on a single layer: it creases and can be manipulated and easily stitched in place. Cutting the scrim on the cross was another idea I had, thinking the leaf edges would look rougher, however the fabric became unstable.  The stems are linen cordadage (handmade) and paper string.  The variety of scale gives interest.


8:17

Below is a much more abstract interpretation.  Felt leaf-type shapes have been stitched onto rough nettle linen and padded with wadding.  I liked the fragmentary nature of this idea, its dappled sunshine and shadows effect.  I considered stitching veins on each leaf shape, but dismissed the idea preferring the designs stark simplicity.


8:18


Thursday 18 August 2022

Chapter 7 : Tactile Contrasts

 So here's an opportunity to take another look at my photographs and develop and extend ideas the from the previous few chapters.  It will be interesting to see how multiples of an idea might look, in some cases as a network, in others how they might appear layered.  This is just what I've already noticed countless times in my field.

So, my plan is to show all sixteen samples on my Sampler and then in pairs briefly describe what I was trying to do and how successfully the idea worked.  I have included quite a number of techniques from Caroline Bartlett's Workshop.  Individual samples are shown from left to right, top to bottom.


7:1


Row One:

7:2


7:3

 Here are spirals in different sizes to create an undulating surface.  As the threads are pulled up creases appear within and between the circles.  The threads are left to lie over them.  Below that sample is a narrower and more tightly spiralled version of an edge idea and unlike the version above the elements are detatched.


7:4


The first example using ideas from Caroline Bartlett's Workshop.  Beads have been wrapped with thread in silk organza, then steamed.  After the beads were removed each bubble was stitched on top with  running stitches between the bubbles. Further stitching would have created a more interesting as well as a greater contrast between bubbles and the background surface.


7:5

Here is an illusion of extreme flatness, the thread and fabric being stretched diagonally.


Row Two:


7:6


Another CB experiment and one I felt was a great success.  Triangles of silk organdie are wrapped round plastic tubing threaded with wire and curved into shape.  Steaming again fixes them and delightful translucent pods are the result.


7:8

A further CB idea: organdie tucked and stitched at varying intervals
 and gather to create a different undulating surface. The separate pods contrast with the integrated surface.


7:9

Still a surface, but this time opaque, pleated and densely stitched, the holes possibly imitating the light through the hedge bottom.


7:10

Here is "cracked ice": stiff, transparent, plastic the seams arranging themselves in mountain folds.


Row Three:


7:11a


7:11 b


 This sample is the one that has caused me the most trouble.  I became fixated on trying to create my hedgerow by folding the fabric, drawing from my sketches and then cutting round them.  Whether in Vilene (b) or, organdie and organza (a), it still looks as if I'm in a fairytale wood with the proportions all wrong.


This, though pleated as in 7:11, is dense with no apertures.


7:12

Here are flakes of chiffon cut using a soldering iron, light, translucent with irregular frayed edges -- a barely there feel to the surface.


7:13

Here in contrast is the ground, dense, nearly opaque, patterned: undulating scrim looped through with silk.


7:14
   

Row Four:


Long stretched out, soft fabric rolled,wrapped in thread and knotted.  Here are a cluster of individual shapes.  They stretch between and beyond each other


7:15

Muslin randomly stitched and drawn into a soft puff -- more CB.  Another version of soft, cloud-like rather than insidious.


7:16


Strips of organza wrapped round cocktail sticks ( CB again) cut to length like blackthorn stems and spikes: hard, unrelenting in their threat and reaching out.


7:17


And finally, a translucent tucked and seamed landscape.  Instead of stretching upwards. like the black thorn it lies along the ground.

*     *     *

Scanning my samples I can see a good range of tactile qualities: the soft and the crisp , the hard and the cushiony, the smooth and the rough, the delicate and the strong, the concentrated and the thinned.  I think a tactile quality is the result of what the fingers feel and the eyes see, not feel alone.  Furthermore, it is how light inter-plays with any material used: its transparency, translucency and opaqueness, and how the light is reflected, or not, by that material.

These tactile samples try to evoke the qualities of landscape, understood in terms of a sense of dimension:how the samples appear to lie along, be vertical, have depth.  They have life and movement, seeming to twine round, enclose, open up, push through. A sense of place is challenging to create, close looking  and careful attention to materials are necessary to do just that.

Saturday 6 August 2022

Chapter 6: Tucks, Pleats and Gathers

 Tucks: I've chosen cotton organdie for this first series of technical samples.  The fabric is crisp with body helping it keep a fold well.  It's also transparent which shows the layers really well.

In Sample 6:1 I've been experimenting with the width of tucks and their spacing.  Pressing these to one side creates some nice sculptural effects, b) looks almost like a clump of blades of grass.

Sample b) in 6:2 really sits best with the 6:1 samples.  It's a double tuck, a narrow one centred on top of a wider one.  There is a formality about it and it gives a really nice raised surface.  Later, I randomly cross-stitched over them to disturb the formality but I wasn't really very happy with the result.

6:1
a) Edge Stitched   b) 1cm wide   c) 1cm wide, but at greater intervals
d) 1cm wide grouped


Below in 6:2 Sample a) shows off set darts and this makes for an irregular surface.  Sample c) is even more irregular.  This is made up of short lengths of tuck at random angles which also causes the fabric in between to crumple.  These could be stuffed.


6:2

Below in 6:3 are three further samples: far left random edge-stitched fine tucks, in the middle tucks made with a zigzag stitch where the width has been varied throughout its length. In the next variant this idea has been extended by using thick embroidery thread in the bobbin.  In both the second and the third samples the needle holes have really contributed to the tucks' appearance.


6:3

Finally in 6:4 are two samples, where the tucks have been repeatedly over-stitched using a zig zag -- the predominance of needle holes is again a feature.  On the right are very simple tucks which have been threaded with raffia and snipped along their length to expose the stuffing material.


6:4

Combination Tucks:  I found using non-fabrics for these samples really interesting, and was surprised how well they stitched.

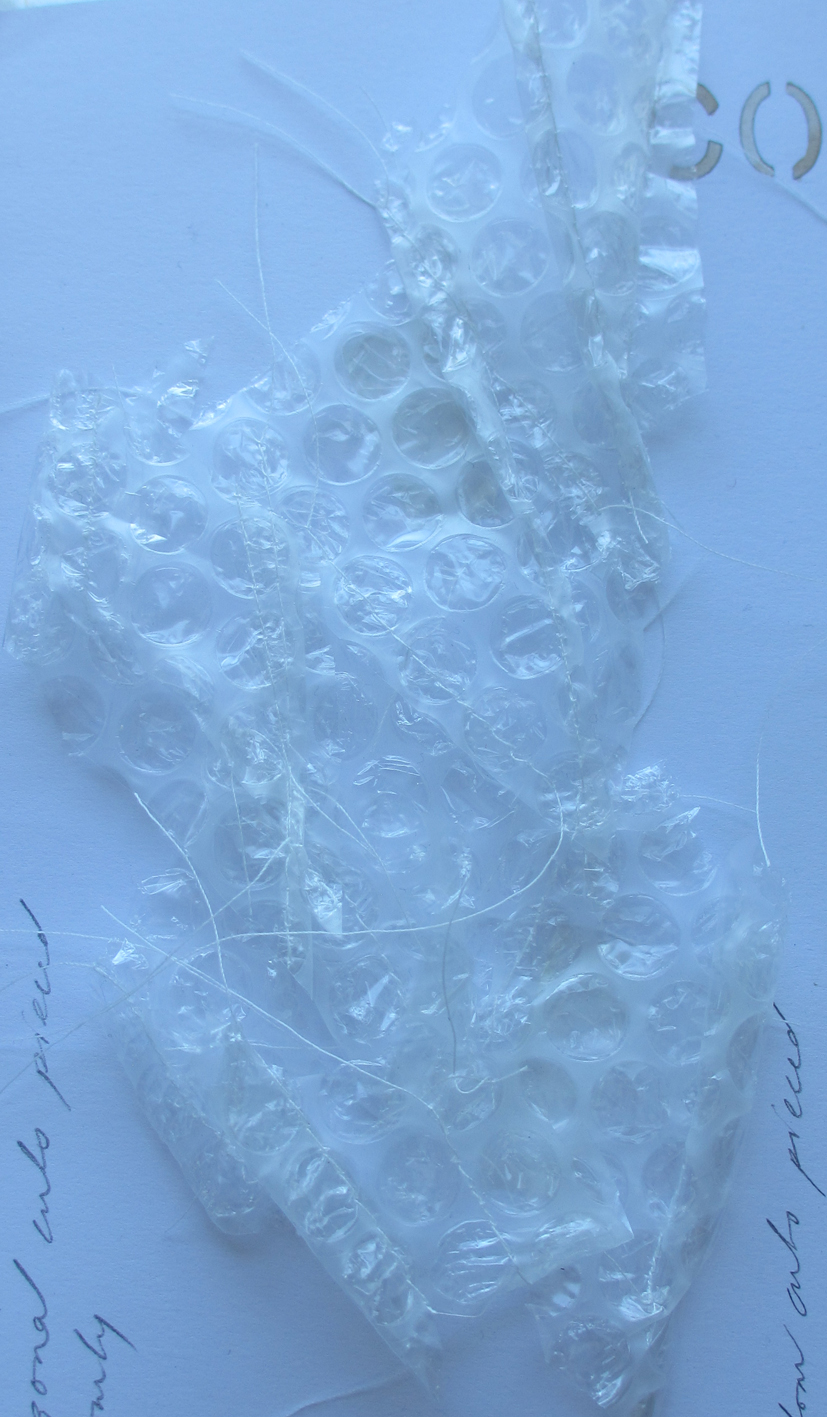
First is 6:5 bubble pack, where tucks have been machined the full length of the material, then cut through diagonally, re-positioned and re-machined.  Jagged edges are produces and the off-set pieces catch the light in an interesting way.


6:5

Below in 6:6 plastic sheeting has been pin-tucked and edge stitched, cut at right angles to those tucks then re-seamed with some tucks uppermost and others facing downwards.  There is scope to use this idea more imaginatively by making the cuts less uniform and re-stitching to form more unpredictable lines in the landscape.


6:6

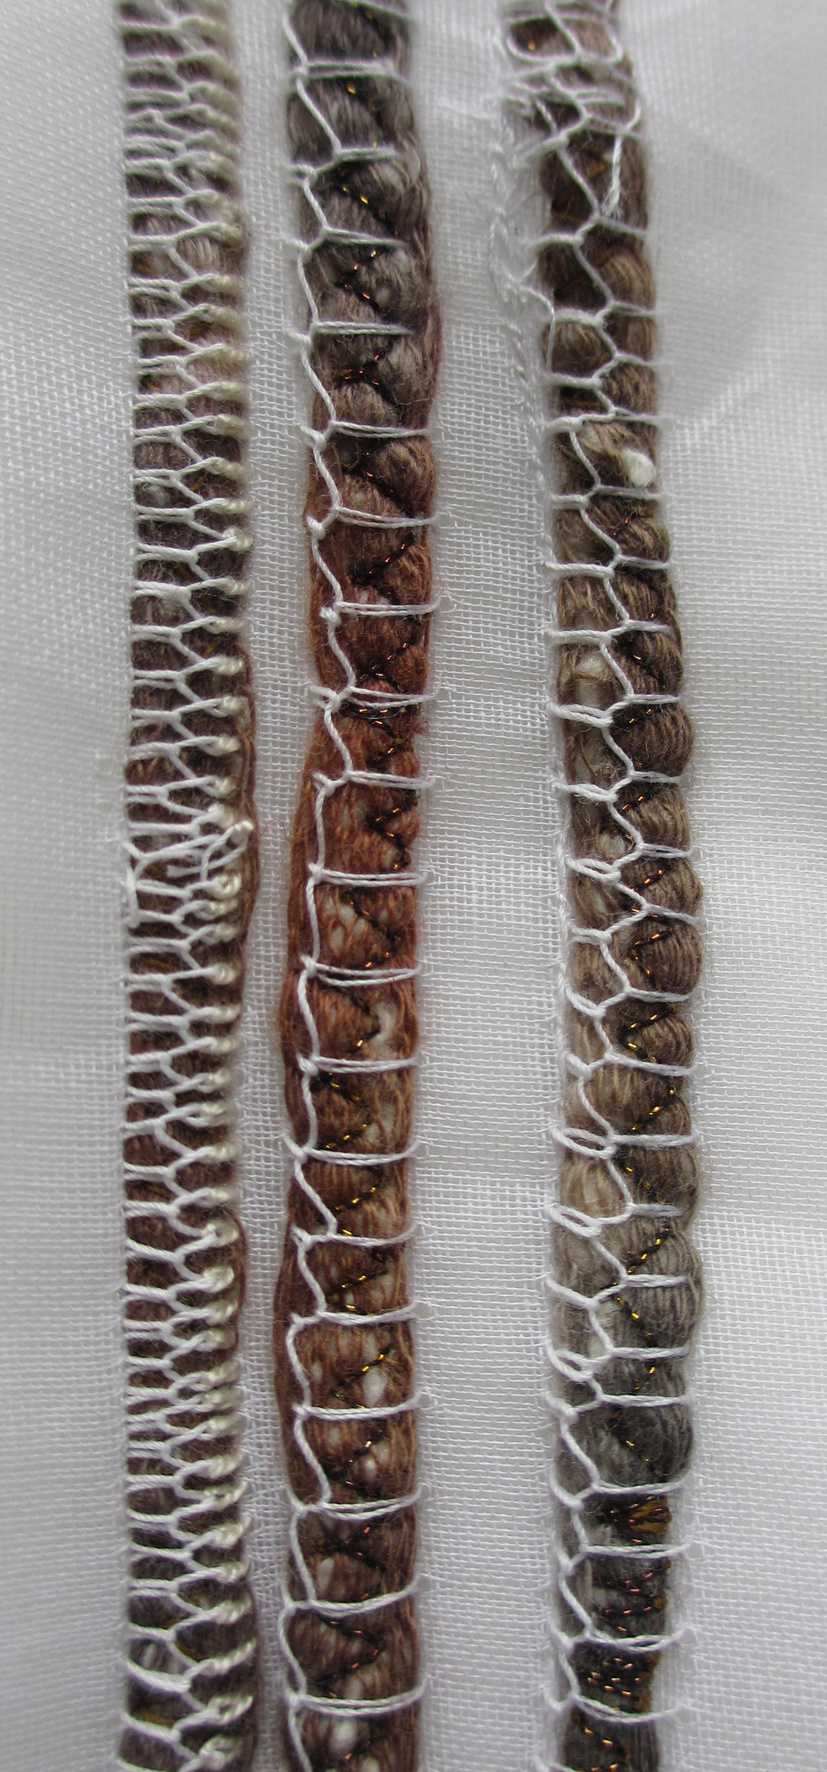
In 6:7 I've used plastic sheeting again (old envelopes from my Selvedge magazine).  Here the material has machine stitched tucks which have been threaded with several strands of thick wool.  This has been drawn up so that the plastic sheeting gathers creating soft pleats between each tuck.  The surface is nicely raised and remains translucent.

6:7


6:8

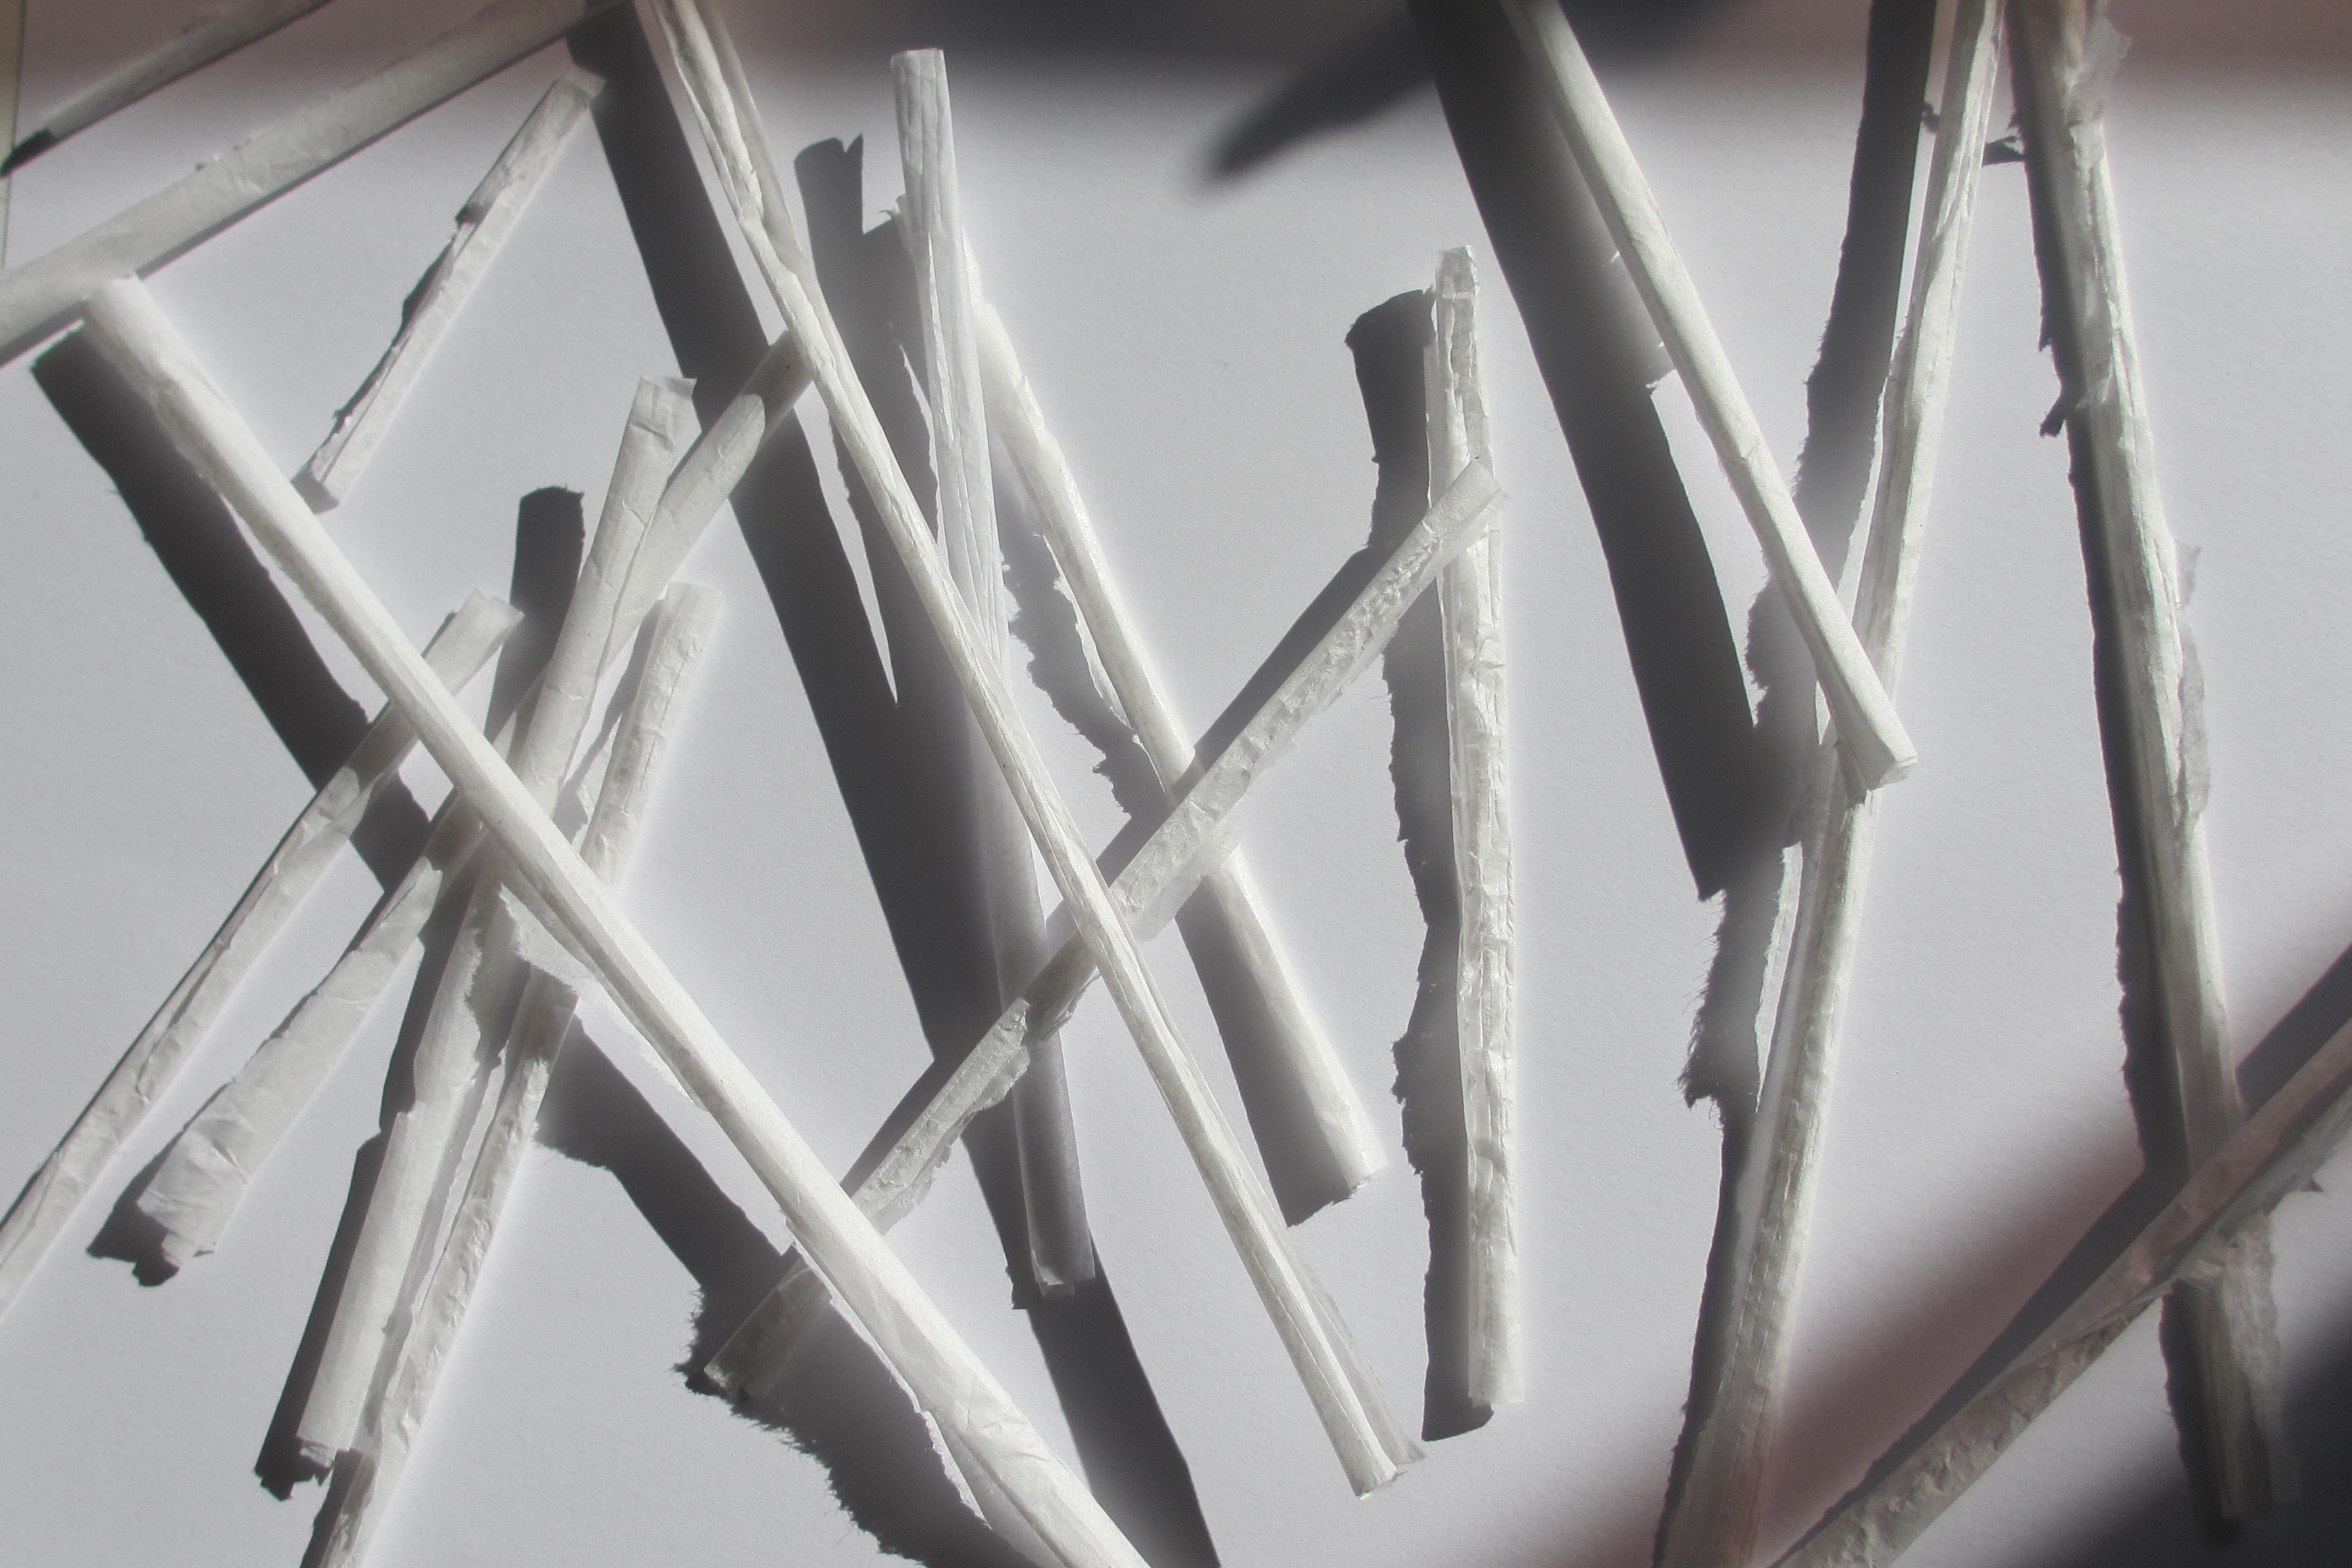
The final sample of these combination tucks is made with stiff clear plastic seamed and cut diagonally, then pieced together with some seams above, some below (the same technique as 6:6).  The effect is like cracked ice on a puddle, the facets are off-set and reflect the light.


Gathers:   Below are three samples of gathers using man-made (net curtain) and natural fibres (muslin).

 In 6:9 radiating gathers from a corner of the net curtain fabric which created a spider's web of soft folds


6:9

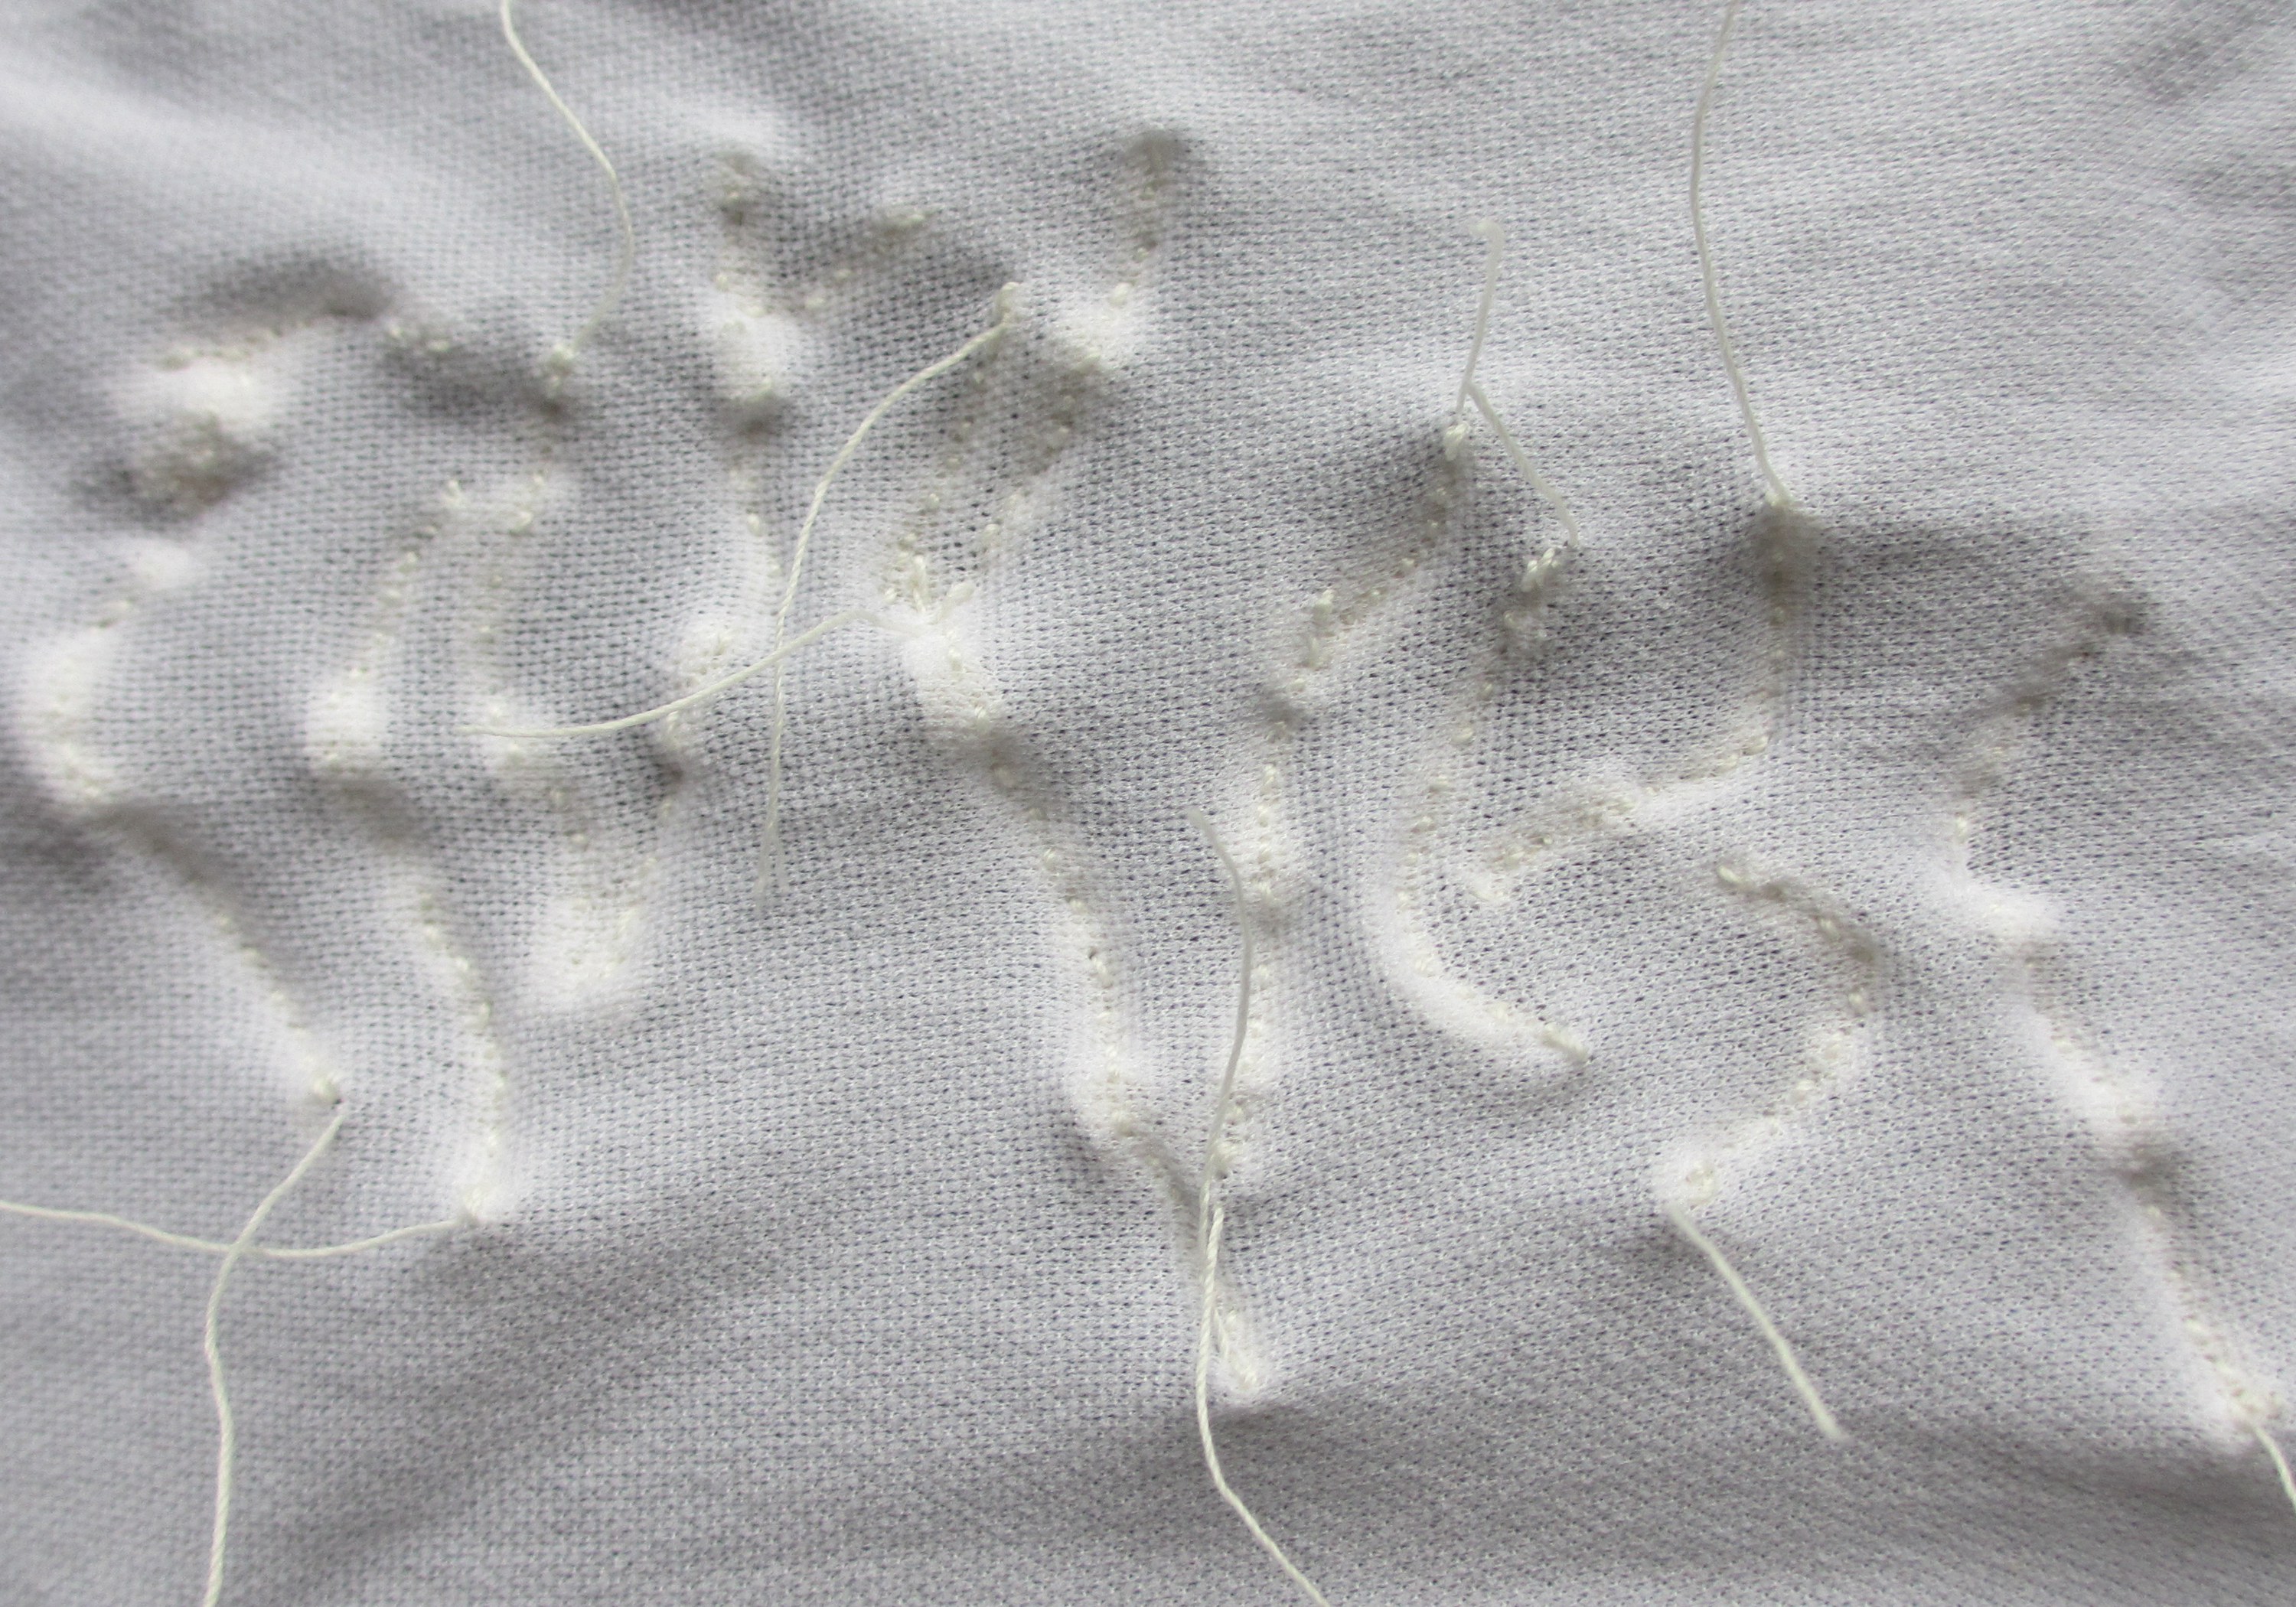
In 6:10 muslin has been stitched in diagonal lines in two directions creating a soft bubbling, puffy effect.

6:10

Then in 6:11 spirals have been stitched close together on a piece of muslin.  I had to pull these shapes from both ends to create this interestingly pleated surface and gradually ease the fabric along the thread: the pleats are both within and between the spirals.

6:11

Since the wonderful Summer School with Caroline Bartlett the world of manipulating fabric and other materials has opened still further and I'm  thoroughly enjoying experimenting with so many interesting ideas.

Friday 15 April 2022

Chapter 5 : Wadded, Shaped and Padded : Corded Quilting


 Having spent very regular time in my field throughout the last year I've had ample time to look at branches, stems and stalks: the straight and stiff their surfaces reeded, like docks.

Other growth  may be curved or arcing studded with thorns or a covering of hairiness.  Then there are branches: thick, branching with the roughness of many year's pruning.

Softer is the long sinuous growth that wraps round everything it meets.  And later in the spring there are dandelion stems, soft tubular affairs.

I'm drawing these things to mind because any cords I use in the future may well need to have this range . . . Firstly, a sort through my Module 3 cords to see what might work..


I'd say I've really just played with the idea in this final section.  Sample 5:21 shows curved quite substantial cords stitched into cotton organdie using zigzag stitch.  Though I played with the stitch tension the results hardly show the cord, which is what I'd hoped to achieve, though it's interesting to see the tucks and slight pleats created by the curved cord.


5:21

In Sample 5:22 silk net is wrapped around a cord, herringbone stitch is used to secure it.  The stitch has become looped and the thread is rather too thick for my liking. It looks heavy handed.


5:22


Sample 5:23 is more successful.  It uses the same net and cord, but this time the net is loosely gathered around the cord and stitched in place with white.  I added zigzag stitching by hand with a toning space dyed thread; it seemed to need it.  I like this sample very much.  It has a quality of a leaf skeleton about it.  It's really interesting to see the way in which crumpled silk net can support the weight of the cords.


5:23

For Sample 5:24 I'm back on the sewing machine trying out a twin needle and playing with stitch length and tension.  The results are random and beautifully unexpected.  These are yet more old stock cords on smooth cotton organdie.

In Sample 5:25 a very different combination with a different effect: this time twisted space-dyed sari silk on toweling.  I'm working on the back of both samples, so each time the result is a surprise. I twist the sari silk as it goes through the machine. It's not as hard as cord and because the toweling has a pile the sari silk ceases to have a clear edge and becomes embedded. Some escapes the stitching entirely, which is pleasing too. On either side are twin stitching directly onto the toweling, another attractive effect.
I had hoped to use some of my lovely space-dyed silk threads but for the machine to accommodate these I need to tweak the tension further.


5:24


5:25

These two ideas in combination might create an interesting surface.

5:26

And here in 5:26 a little more experimenting.  The colours are a little bolder: I'm using what I have in stock and I've managed to solve the tension problem. I was also able to include other twin-stitched thread and try overlaying several rows of stitching.  My preference is the more subtle 5:25 which I think is less about pattern, more about mood.  If I use this technique in the future I need to buy some King Tut in neutral shades. Interestingly the density of stitching stiffens the piece and makes it almost free standing.

Then finally, a technique I found in "Machine Embroidery Stitch Techniques" by Valerie Campbell-Harding and Pamela Watts.  It just appealed, though again the threads might  benefit from being more subtle.  Rows of multi-thread linen are zigzagged down on very thick linen in short runs.  The gaps between are cut and the multi-threads partially separated creating splayed tufts.  5:28 is the reverse of this piece.


5:27

5:28